How to work in html
HTML Tutorial
HTML stands for Hyper Text Markup Language.HTML is widely used on The Web to develop web pages.
HTML - Overview
Basic HTML Document
The example of HTML document is given below.

You can use Try it an option on the top right corner of the code box to check the result of this HTML code.Finally, open it using a web browser which is installed on your PC OR LAPTOP etc. Internet Explorer or Google Chrome, or Firefox are the examples of web browsers.
HTML Tags
HTML tags are enclosed within angle braces <Tag Name>.Most of the tags have their corresponding closing tags as shown. For instance, <html> has its closing tag </html> and <body> tag has its closing tag </body> tag etc.
HTML document uses the tags as give below −
| Sr.No | Tag & Description |
|---|---|
| 1 | <!DOCTYPE...> |
| 2 | <html>
<html> tag is used to enclosed complete HTML document & mainly comprises of document header which is represented by <head>...</head> & document body which is represented by <body>...</body> tags.
|
| 3 | <head>
<head> represents the document's header which can keep other HTML tags like <title>, <link> etc.
|
| 4 | <title>
<title> tag is used inside the <head> tag to mention the document title.
|
| 5 | <body>
This represents the document's body which keeps other HTML tags like <h1>, <div>, <p> <br>.
|
| 6 | <h1>
This tag represents the heading (BIGGEST HEADING).
|
| 7 | <p>
This tag represents a paragraph in html.
|
If you want to learn HTML you will need to study various tags & understand how they behave while formatting a textual document. As we know that HTML is simple as users have to learn the usage of different tags in order to format the text OR images to make a beautiful web page which you want.
HTML Document Structure
HTML document will have the following structure as shown in given picture −

We will study all the header and body tags.
HTML - Basic Tags
Heading Tags
As we know that almost every document starts with a heading so you can use different sizes for your headings. HTML has six levels of headings as shown <h1>, <h2>, <h3>, <h4>, <h5>, & <h6>. While displaying any heading, the browser adds one line before and one line after that heading as given in following screenshots.
Example

This will produce the following result as shown below −

Paragraph Tag
This <p> tag used to structure text into different paragraphs. Every paragraph of text should be written between the opening <p> & a closing </p> tag as shown below in the given example −
Example

This will produce the following result −

Line Break Tag
whenever you use <br /> element, anything following it starts from the next line. This tag is an example of an empty element so you do not need opening and closing tags as shown in given example.
Example
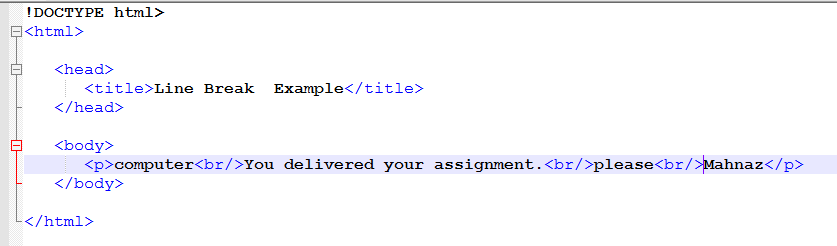
This will produce the following result −

Centering Content
<center> tag use to put any content in the center of the page or any table cell as shown below.
Example

This will produce the following result −

Horizontal Lines
The <hr> tag used to create a line from the current position in the document to the right margin and breaks the line as given below.
Example

This will produce the following result −

as we know that <hr /> tag is an example of the empty element, where you do not need opening and closing tags.
Sometimes, we want our text to follow the same format as written in the HTML document so you can use the preformatted tag <pre>.
Opening <pre> tag and the closing </pre> tag will preserve the formatting of the source document which you want to preserve as given below.
Example

This will produce the following result −

As we know that HTML is a markup language so an HTML element consists of a start tag & end tag, with the content inserted in between as given below:
<tagname>Content goes here...</tagname>
The HTML element is everything from the start tag to the end tag as shown below.
| Start Tag | Content | End Tag |
|---|---|---|
| <p> | This is paragraph content. | </p> |
| <h1> | This is heading content. | </h1> |
| <div> | This is division content. | </div> |
| <br /> | Line break. |
So here <p>....</p> & <h1>...</h1> are HTML element. There are some HTML elements which don't need to be closed, such as <img.../>, <hr /> and <br /> elements. These are known as void elements because here we dont need any closing tab.
Nested HTML Elements
Nested HTML allowed to keep one HTML element inside another HTML element as given below −
Example

This will display the following result −
Attributes provide additional information about HTML elements.
HTML Attributes
- As we know that all HTML elements can have attributes and work in HTML.
- Attributes provide additional information about an element & work in HTML.
- Attributes are always specified in the start tag during work in HTML.
- Attributes usually come in name/value pairs like name="value" work in HTML.
Example

This will display the following result −

Core Attributes
- I'd
- Title
- Class
- Style
The Id Attribute
The id attribute uniquely identifies any element within an HTML page. There are 2 primary reasons that you might want to use an id attribute on an element the reasons are given below −
- If we use id attribute as a unique identifier work in html, it is possible to identify just that element and its content.
- If you have two elements of the same name within a Web page (or style sheet), you can use the id attribute to distinguish between elements that have the same name.
Example
The title Attribute
It gives a suggested title for the element. The syntax for the title attribute is similar as explained for id attribute as given below −
Example

This will produce the following result −

Now move your mouse cursor to the "Titled Heading Tag Example" during working in html & you will see that whatever title you used in your code is coming out as a tooltip of the mouse arrow work in html.
The class Attribute
It is used to associate an element with a style sheet, & specifies the class of element. We will learn further attributes when you will learn Cascading Style Sheet (CSS) which u have not learned yet. So, for now, you can avoid it.

The style Attribute
It allows you to specify Cascading Style Sheet (CSS) rules within the element as given in below picture.

This will produce the following result −


We are not learning CSS this time, so just let's proceed without bothering much about CSS. Here, you need to understand what are HTML attributes work in HTML.
Internationalization Attributes
The three Internationalization Attributes are as given below.
- dir
- lang
- xml:lang
The dir Attribute
This attribute allows you to indicate to the browser about the direction in which the text should flow so it can take one of two values, as you can see in the table that given below −
| Value | Meaning |
|---|---|
| ltr | Left to right (the default value). |
| rtl | Right to left (for languages such as Hebrew or Arabic that are read right to left). |
Example

This will produce the following result −

The lang Attribute
It allows you to indicate the main language used in a document, but this attribute was kept in HTML only for backward compatibility with earlier versions of HTML so this attribute has been replaced by the xml: lang attribute in new XHTML documents work in HTML.
Example

Generic Attributes
Here's a table of some other attributes that are readily usable with many of the HTML tags.
| Attribute | Options | Function |
|---|---|---|
| align | right, left, center | Horizontally aligns tags |
| valign | top, middle, bottom | Vertically aligns tags within an HTML element. |
| bgcolor | numeric, hexi decimal, RGB values | Places a background color behind an element |
| background | URL | Places a background image behind an element work in html. |
| id | User Defined | Names an element for use with Cascading Style Sheets. |
| class | User Defined | briefly defines an element for use with Cascading Style Sheets works in html. |
| width | Numeric Value | Specifies the width of tables, images, or table cells work in html. |
| height | Numeric Value | Specifies the height of tables, images, or table cells. |
| title | User Defined | "Pop-up" title of the elements. |
HTML - Formatting
Bold Text
Anything that is written b/w <b>...</b> element, is displayed in bold as shown in below picture−
Example

This will produce the following result −

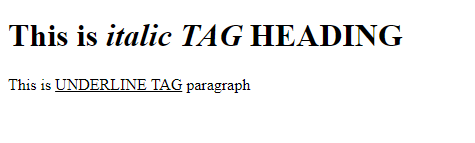
Italic Text
Anything that is written b/w <i>...</i> element is displayed in italicized as shown in below picture −
Example

This will produce the following result −

Underlined Text
Anything that is written b/w <u>...</u> element, is displayed with underline during working in html as shown in below picture −
Example

This will produce the following result −

Strike Text
Anything that is written b/w <strike>...</strike> element is displayed with strikethrough, which is a thin line through the text as shown in below picture −
Example

This will produce the following result −

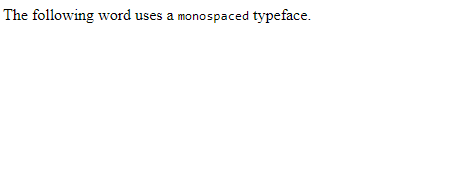
Monospaced Font
Anything that is written b/w <tt>...</tt> element is written in monospaced font. As we know that the most of the fonts are known as variable-width fonts because different letters are of different widths (for instance, the letter 'm' is wider than the letter 'i') work in html. In a monospaced font, however, each letter has the same width as given below.
Example

This will produce the following result −
Superscript Text
Anything that is written b/w <sup>...</sup> element is written in superscript work in html; the font size used is the same size as the characters surrounding it but is displayed half a character's height above the other characters as shown in below picture.
Example

This will produce the following result −

Subscript Text
Anything that is written b/w <sub>...</sub> element is written in subscript work in html; the font size used is the same as the characters surrounding it but is displayed half a character's height beneath the other characters as given below.
Example

This will produce the following result −

Inserted Text
Anything that is written b/w <ins>...</ins> element is displayed as inserted text as given below.
Example

This will produce the following result −

Deleted Text
Anything that is written b/w <del>...</del> element, is displayed as deleted text.
Example

This will produce the following result −

Larger Text
Anything that is written b/w <big>...</big> element is displayed one font size larger than the rest of the text surrounding it as shown in below picture−
Example

This will produce the following result −

Smaller Text
The content that is written b/w <small>...</small> element is displayed one font size smaller than the rest of the text surrounding it as shown in below picture−
Example

This will produce the following result −

Grouping Content
The <div> and <span> element is used to group together several elements to create sections OR subsections of a page as given below in the picture.
Example

This will produce the following result −

If you want that your sentence or paragraph is written together, you could use the <span> element as shown in below picture.

This will produce the following result −

These tags are commonly used with CSS which allows you to attach a style to a section of a page work in html.
HTML - Phrase Tags
Phrase tags have been designed for some specific purposes, though they are displayed in the same way as other basic tags like <b>, <i>, <pre>, & <tt>, you have studied in the previous work in html.
Emphasized Text
Anything that is written b/w <em>...</em> element is displayed as emphasized text as shown in given example.
Example

This will produce the following result −

Marked Text
Anything that is written b/w <mark>...</mark> element, is displayed as marked with yellow ink as shown in below image.

This will produce the following result −

Strong Text
Anything that is written b/w <strong>...</strong> element is displayed as important text as shown in given screenshot.

This will produce the following result −


Acronym Element
It allows you to indicate that the text you enter between <acronym> & </acronym> tags is an acronym as shown in below picture.

This will produce the following result −

Text Direction
The <bdo>...</bdo> element stands for Bi-Directional Override & it is used to override the current text direction as shown in below image.


Quoting Text
If you want to quote a passage or paragraph or anything, you should put it in between <blockquote>...</blockquote> tags as shown in below image.


This will produce the following result −

Short Quotations
If you want to add double quote you can use <q>...</q> element as shown in below image.

This will produce the following result −

Computer Code
Any programming code to appear on a Web page should be written inside <code>...</code> tags work in html. Usually, the content of the <code> element is presented in a monospaced font, just like the code in most programming books as shown in below screenshot.

This will produce the following result −

Keyboard Text
If we want to tell a reader to enter some text so you can use the <kbd>...</kbd> element to indicate what should be typed in work in html, as shown in below screenshot.

This will produce the following result −

Programming Variables
If you want to show that the content of the element is a variable you will use <pre> and <code>elements work in html as shown in below image.

This will produce the following result −

Program Output
The <samp>...</samp> element shows you the sample output from a program, and script etc work in html. Again, it is mainly used when documenting programming or coding concepts as given below.

This will produce the following result −


Address Text
The <address>...</address> element is used to contain any address work in html.

This will produce the following result −


HTML - Comments
As we know that HTML comments are placed in between <!-- ... --> tags work in html. So, any content placed between <!-- ... --> tags will be treated as a comment and will be completely ignored by any browser which you used as shown in below image.
Example

This will produce the following result

Multiline Comments
We can comment multiple lines by using the special beginning tag <!-- & ending tag --> placed before the first line & at the end of the last line as shown in below screenshot.
Example

This will produce the following result −


This will produce the following result −

Commenting Style Sheets
Here you must make a note that if you are using Cascading Style Sheet (CSS) work in html. HTML code then it is recommended to put that style sheet code inside proper HTML comments so those old browsers can work properly as shown in below screenshot.
Example

This will produce the following result −

Insert Image
<img src = "Image URL" ... attributes-list/>
Example

This will produce the following result −

You can use any format image like PNG, JPEG or GIF image file based on your comfort but make sure you specify correct image file name in src attribute work in html. The image name is always case sensitive as we know.
This alt attribute specifies an alternate text for an image if the image cannot be displayed work in html.
Set Image Location
Sometimes we keep all the images in a separate directory or folder. So let's keep HTML file test.htm in our home directory & create a subdirectory images inside the home directory where we will keep our image test.png in this way HTML easily find the image as given below.
Example

This will produce the following result −

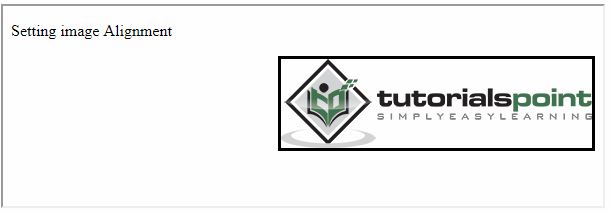
Set Image Width/Height
We can set image width & height based on our requirement using width & height attributes. We can specify width & height of the image in terms of either pixels or percentage of its actual size as shown in below image.
Example

This will produce the following result −

Set Image Border
If we want to add a border around the image the instructions are given below in the example.
Example


This will produce the following result −
HTML - Tables
If we want to create html table we can use the <table> tag in which the <tr> tag is used to create table rows and <td> tag is used to create data cells work in html. The elements under <td> are regular & left aligned by default as shown in below image.
Example

This will produce the following result −

Table Heading
Table heading can be defined using the <th> tag as shown in below screenshot.
Example

This will produce the following result −

Cellpadding and Cellspacing Attributes
There are two attributes called cell padding & cell spacing which you will use to adjust the white space in your table cells during working in html. The cell spacing attribute defines space between table cells, while cell padding represents the distance b/w cell borders & the content within a cell as shown in below example.
Example

This will produce the following result −

Colspan and Rowspan Attributes
We will use col span attribute if we want to merge two OR more columns into a single column work in html. Similar way you will use row span if you want to merge two or more rows as given in below screenshot.
Example

This will produce the following result −

Tables Backgrounds
- bgcolor attribute − You can set the background color for the whole table or just for one cell work in html.
- background attribute − You can set a background image for the whole table or just for one cell work in html.
Example

This will produce the following result −

Here is an example of using background attribute work in html. Here we will use an image available in /images directory as shown in below image.

This will produce the following result as shown in below image. Here background image did not apply to table's header work in html.

Table Height and Width
If you want to set width & height attributes. You can specify table width or height in terms of pixels or in terms of percentage of available screen area as shown in below image.
Example

This will produce the following result −
Table Header, Body, and Footer
As we know that Tables can be divided into 3 portions − a header, a body, & a foot. As we know that during working in html the head & foot are rather similar to headers & footers in a word-processed document that remain the same for every page, while the body is the main content holder of the table work in HTML.
- <thead> − to create a separate table header.
- <tbody> − to indicate the main body of the table.
- <tfoot> − to create a separate table footer.
But it is notable that <thead> & <tfoot> tags should appear before <tbody> as shown in below image.
Example

This will produce the following result −


As we know that HTML offers web authors 3 ways for specifying lists of information work in html. All lists must contain one OR more list elements. Lists may contain the following −
- <ul> − An unordered list. This will list items using plain bullets work in html.
- <ol> − An ordered list. This will use different schemes of numbers to list your items work in html.
- <dl> − A definition list. This arranges your items in the same way as they are arranged in a dictionary work in html.
HTML Unordered Lists
An unordered list is a collection of related items that have no special order or sequence work in html. This list is created by using HTML <ul> tag so each item in the list is marked with a bullet as shown in below example.
Example

This will produce the following result −

The type Attribute
You can use type attribute for a <ul> tag to specify the type of bullet you like work in html. By default, it is a disc. Following are the possible options as shown below −
<ul type = "square">
<ul type = "disc">
<ul type = "circle">
Example
Following is an example where we used <ul type = "square">

This will produce the following result −

Example
Following is an example where we used <ul type = "disc"> −

This will produce the following result −

Example
Following is an example where we used <ul type = "circle"> −
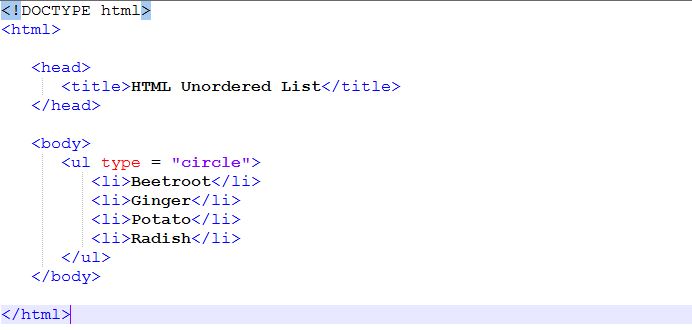
This will produce the following result −

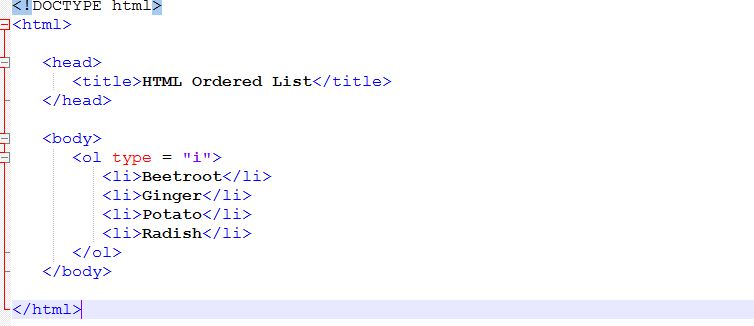
HTML Ordered Lists
If we want that our items in a numbered list instead of bulleted, then HTML ordered list will be used work in html. This list is created by using a <ol> tag. The numbering starts at one & is incremented by one for each successive ordered list element tagged with <li> as shown in below image.
Example

This will produce the following result −

The type Attribute
<ol type = "1"> - Default-Case Numerals.
<ol type = "I"> - Upper-Case Numerals.
<ol type = "i"> - Lower-Case Numerals.
<ol type = "A"> - Upper-Case Letters.
<ol type = "a"> - Lower-Case Letters.
Example
Following is an example where we used <ol type = "1">

This will produce the following result −

Example
Following is an example where we used <ol type = "I">

This will produce the following result −

Example
Following is an example where we used <ol type = "i">
This will produce the following result −

Example
Following is an example where we used <ol type = "A" >

This will produce the following result −

Example
Following is an example where we used <ol type = "a">

This will produce the following result −

The start Attribute
To specify the starting point of numbering we need start attribute in html for the <ol> tag so Following are the possible options as shown−
<ol type = "1" start = "4">    - Numerals starts with 4.
<ol type = "I" start = "4">    - Numerals starts with IV.
<ol type = "i" start = "4">    - Numerals starts with iv.
<ol type = "a" start = "4">    - Letters starts with d.
<ol type = "A" start = "4">    - Letters starts with D.
Example
Following is an example where we used <ol type = "i" start = "4" >

This will produce the following result −

HTML Definition Lists
As we know that HTML & XHTML supports a list style which is called definition lists where entries are listed like in a dictionary or encyclopedia work in html as shown below.
Definition List makes use of following three tags.
- <dl> − Defines the start of the list
- <dt> − A term
- <dd> − Term definition
- </dl> − Defines the end of the list
Example

This will produce the following result −

HTML - Text Links
Linking Documents
A link is specified using HTML tag <a> work in html. This tag is called anchor tag & anything b/w the opening <a> tag & the closing </a> tag becomes part of the link & a user can click that part to reach to the linked document. Following is a simple syntax to use <a> tag as show below.
<a href = "Document URL" ... attributes-list>Link Text</a>
Example

This will produce the following result

The target Attribute
The target attribute is used to specify the location where a linked document is opened. Following are the possible options as given below −
| Sr.No | Option & Description |
|---|---|
| 1 |
_blank
Opens the linked document in a new window or tab work in html.
|
| 2 |
_self
Opens the linked document in the same framework in html.
|
| 3 |
_parent
Opens the linked document in the parent framework in html.
|
| 4 |
_top
Opens the linked document in the full body of the window work in html.
|
| 5 |
targetframe
Opens the linked document in a named target-frame work in html.
|
Example

This will produce the following result.

Use of Base Path
This tag is used to give a base path for all the links & your browser will concatenate given relative path to this base path & will make a complete URL as shown in below example.
Example

This will produce the following result

Linking to a Page Section
First of all, create a link to the place where we want to reach a web page & name it using <a...> tag as follows −
<h1>HTML Text Links <a name = "top"></a></h1>
2nd step is to create a hyperlink to link the document & place where you want to reach as given below −
<a href = "/html/html_text_links.htm#top">Go to the Top</a>
This will produce following link work in html, where we can click on the link generated Go to the Top to reach to the top of the HTML Text Link tutorial as shown below.
Go to the Top
Setting Link Colors
We can set colors of our links, active links & visited links using link, alink & vlink attributes of a <body> tag as given below.
Example

This will produce the following result.

Download Links
We can create a text link to make our PDF, OR DOC OR ZIP files downloadable. This is very simple; we just need to give complete URL of the downloadable file as shown in below screenshot −

The result is given below.

File Download Dialog Box
If we want to make a Filename file downloadable from a given link then its syntax will show in below image.

HTML - Image Links
Here we learned how to use images in our web pages work in html.
Example
It's simple to use an image as a hyperlink which is given below.

This will produce the following result.

Mouse-Sensitive Images
There are two ways to create image maps −
- Server-side image maps −
- Client-side image maps −
Server-Side Image Maps
When we use ismap, the href attribute of the containing <a> tag must contain the URL of a server application like a cgi or PHP script etc work in html. to process the incoming request based on the passed coordinates as shown in the screenshot.
As we know that the coordinates of the mouse position are screen pixels counted from the upper-left corner of the image in html, beginning with (0,0). The coordinates, preceded by a question mark, are added to the end of the URL work in html.
For example, if a user clicks 20 pixels over & 30 pixels down from the upper-left corner of the following image as shown below −

Which has been generated by the following code picture −

Then your web browser sends the following search parameters to the web server which can be processed by ismap.cgi script OR map file & you can link whatever documents you like to these coordinates as shown below−
/cgi-bin/ismap.cgi?20,30
In this way, we can assign different links to different coordinates of the image & when those coordinates are clicked, We can open corresponding linked document work in html.
Client-Side Image Maps
Here's an example from the image map −

HTML - Email Links
HTML Email Tag
HTML <a> tag provides you us option to specify an email address to send an email in html. While using <a> tag an email tag, you will use mailto: email address along with href attribute work in html as shown below.
<a href = "mailto: abc@example.com">Send Email</a>
This code will generate the below-given link which you can use to send email work in html.
Send Email
Default Settings
We can specify a default email subject & email body along with your email address. Following is the example to use default subject & bodywork in html.
<a href = "mailto:abc@example.com?subject = Feedback&body = Message">
Send Feedback
</a>
HTML - Frames
HTML frames are used to divide our browser window into multiple sections where each section can load a separate HTML document work in html.
Creating Frames
To use frames on a page we use <frameset> tag instead of <body> tag. The <frameset> tag defines, how to divide the window into a frame as shown in given example.
Example
Following is the example to create three horizontal frames given below −

This will produce the following result −

Example
Here we can replace rows attribute by cols & changed their width. This will create all the three frames vertically as shown below −

This will produce the following result −

The <frameset> Tag Attributes
Following are important attributes of the <frameset> tag −
| Sr.No | Attribute & Description |
|---|---|
| 1 |
cols
Defines how many columns are contained in the frameset & the size of each column. You can specify the width of each column in one of the four ways as given below −
Absolute values in pixels. For example, to create three vertical frames, use cols = "100, 500, 100" work in html.
A percentage of the browser window. For example, to create three vertical frames, use cols = "10%, 80%, 10%" work in html.
Using a wildcard symbol. For example, to create three vertical frames, use cols = "10%, *, 10%". In this case, wildcard takes the remainder of the window work in html.
As relative widths of our web browser window. For example, to create three vertical frames, use cols = "3*, 2*, 1*". This is an alternative to percentages. You can use relative widths of the browser window. Here the window is divided into sixths: the first column takes up half of the window, the second takes one third, and the third takes one-sixth work in html.
|
| 2 |
rows
This attribute works just like the cols attribute and takes the same values, but it is used to specify the rows in the frameset. For example, to create two horizontal frames, use rows = "10%, 90%". You can specify the height of each row in the same way as explained above for columns work in html.
|
| 3 |
border
This attribute specifies the width of the border of each frame in pixels. For example, border = "5". A value of zero means no border work in html.
|
| 4 |
frameborder
This attribute specifies whether a three-dimensional border should be displayed between frames. This attribute takes value either 1 (yes) or 0 (no). For example frameborder = "0" specifies no border work in html.
|
| 5 |
This attribute specifies the amount of space between frames in a frameset. This can take any integer value. For example, framespacing = "10" means there should be 10 pixels spacing between each framework in html.
|
The <frame> Tag Attributes
Following are the important attributes of <frame> tag as shown below −
| Sr.No | Attribute & Description |
|---|---|
| 1 |
src
This attribute is used to give the file name that should be loaded in the frame in html. Its value can be any URL. For example, src = "/html/top_frame.htm" will load an HTML file available in html directory work in html.
|
| 2 |
This attribute allows you to give a name to a frame. It is used to indicate which frame a document should be loaded into in html. This is especially important when you want to create links in one frame that load pages into an another frame, in which case the second frame needs a name to identify itself as the target of the link work in html.
|
| 3 |
frameborder
This attribute specifies whether or not the borders of that frame are shown in html; it overrides the value given in the frameborder attribute on the <frameset> tag if one is given, and this can take values either 1 (yes) or 0 (no) work in html.
|
| 4 |
marginwidth
This attribute allows you to specify the width of the space between the left and right of the frame's borders & the frame's content in html. The value is given in pixels. For example marginwidth = "10" work in html.
|
| 5 |
marginheight
This attribute allows you to specify the height of the space between the top & bottom of the frame's borders & its contents in html. The value is given in pixels. For example marginheight = "10" work in html.
|
| 6 |
noresize
By default, we can resize any frame by clicking & dragging on the borders of a frame. The noresize attribute prevents a user from being able to resize the frame. For example noresize = "noresize" work in html.
|
| 7 |
scrolling
This attribute controls the appearance of the scrollbars that appear on the frame in html. This takes values either "yes", "no" or "auto". For example scrolling = "no" means it should not have scrollbars work in html.
|
Frame's name and target attributes
Let's see following example where a test.htm file has following code −

Here, we have created two columns to fill with two frames. The first frame is 200 pixels wide & will contain the navigation menu bar implemented by menu.htm file. The second column fills in remaining space & will contain the main part of the page & it is implemented by main.htm file in html. For all the three links available in a menu bar, we have mentioned target frame as main_page, so whenever you click any of the links in menu bar, available link will open in main page work in html.
Following is the content of menu.htm file as shown below.

Following is the content of main.htm file −

When we load test.htm file, it produces the following result −

Now WE can try to click links available in the left panel & see the result. The target attribute can also take one of the following values work in html−
| Sr.No | Option & Description |
|---|---|
| 1 |
_self
Loads the page into the current frame in html.
|
| 2 |
_blank
Loads a page into a new browser window. Opening a new window work in html.
|
| 3 |
_parent
Loads the page into the parent window, which in the case of a single frameset is the main browser window work in html.
|
| 4 |
_top
Loads the page into the browser window, replacing any current frames work in html.
|
| 5 |
targetframe
Loads the page into a named target frame.
|
HTML - Iframes
The <iframe> tag defines a rectangular region within the document in which your web browser can display a separate document, including scrollbars & borders. An inline frame is used to embed another document within the current HTML document work in html.
The src attribute is used to specify the URL of the document that occupies the inline frame work in html.
Example
Following is the example to show how to use the <iframe> −

This will produce the following result −

The <Iframe> Tag Attributes
Note − The frameborder, marginwidth, longdesc, scrolling, marginheight attributes deprecated in HTML5. Do not use these attributes.
| Sr.No | Attribute & Description |
|---|---|
| 1 |
src
This attribute is used to give the file name that should be loaded in the frame in html. Its value can be any URL. For example, src = "/html/top_frame.htm" will load an HTML file available in html directory work in html.
|
| 2 |
name
This attribute allows us to give a name to a frame in html. It is used to indicate which frame a document should be loaded into. It is specially important when we want to create links in one frame that load pages into an another frame in html, in which case the second frame needs a name to identify itself as the target of the link work in html.
|
| 3 |
frameborder
This attribute specifies whether or not the borders of that frame are shown in html; it overrides the value given in the frameborder attribute on the <frameset> tag if one is given, and this can take values either 1 (yes) or 0 (no) work in html.
|
| 4 | |
| 5 | |
| 6 |
height
This attribute specifies the height of <iframe> work in html.
|
| 7 | |
| 8 | |
| 9 |
width
This attribute specifies the width of <iframe>work in html.
|

nyc work!
ReplyDeleteBest Arabic sweets in Dubai
ReplyDeleteArabic sweets in Dubai
Dubai sweets
Thanks for your great post.HTML
ReplyDelete